If you want to treat your kitty, it’s a great idea to get your pet something special, but things can quickly become costly.
Not only can handmade gifts be cheaper, but they can also feel a lot more personal (after all, it takes a lot of effort to make a present. Trust me, I know!). So, for your feline friend, or the friend in your life with a feline, we’ve put together a simple tutorial on how to make a cat toy using (mostly) things you might already have at home.
It takes a bit of effort but will definitely be a much appreciated gift!
The tutorial
You will need:

- Material – this could be from an old t-shirt or any scrap material you happen to have, like us.
- Paper and a pencil – for drawing out your pattern. If you’re not confident at eyeballing it, you can print ours.
- Something for the tail – we’ve used a strong bit of twine someone used to wrap presents with last year. Whatever you use needs to be quite strong and you may need to replace it if the fibres start to come off in your cat’s mouth!
- Scissors – for cutting material and templates. We’ve got a different pair for paper and fabric.
- Needle and thread – for sewing. Did we mention you’ll have to sew this by hand?
- Stuffing – we’re using soft toy stuffing from a craft shop (a lot of people/pets are getting homemade gift this year) but you could take apart an old cushion and pull the stuffing out of that.
You’ll also need some pins or similar to hold the fabric together while you sew. If you’d like, you can get some catnip and we’ll tell you where you can use this in the instructions.
Step one – the template
If you’re feeling confident or are particularly good at making sewing patterns, you might be able to make the pattern yourself. You’ll need to create a template for the body and ears by having a side template (shaped like you’d imaging the side of a mouse to look), bottom template (shaped like a big fat teardrop) and ear templates.
Step two – cut your material
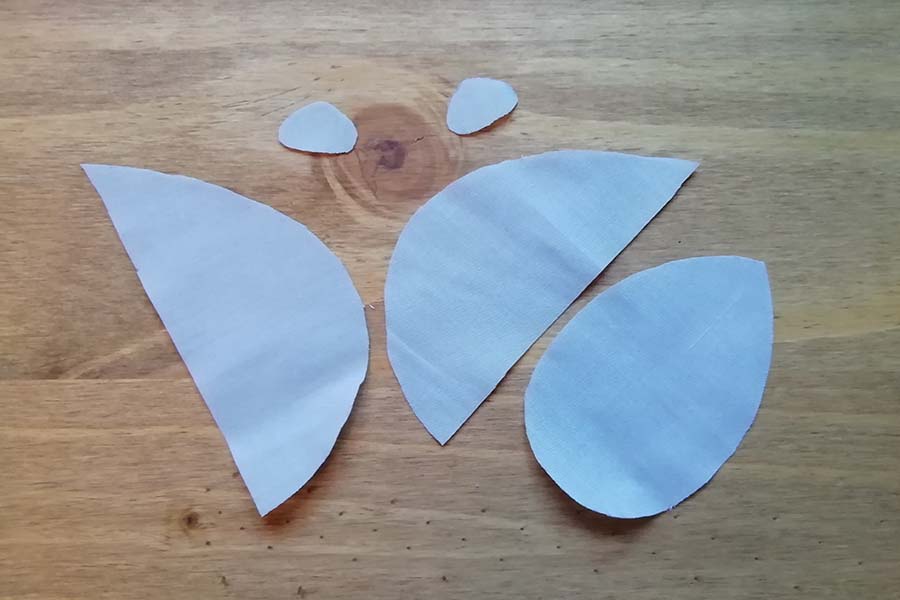
Using your template pieces, you’ll need to cut two side pieces, one bottom piece and two ears from your material.
Step three– sew the two side pieces together
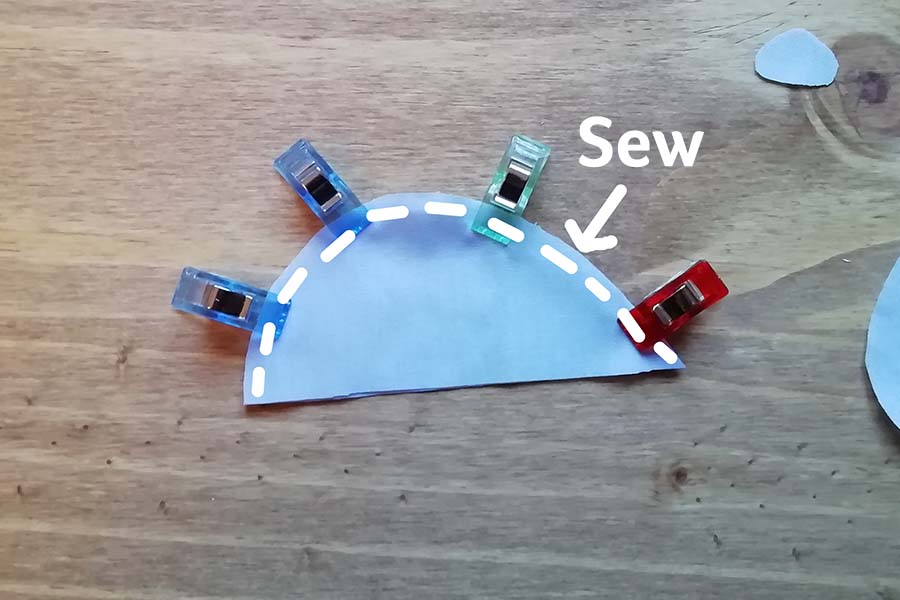
Pin together the two side pieces. If you’re using fabric with a pattern, make sure the sides you want showing are on the inside, as after you sew it all together you’ll be turning it the right way round.
Sew them together around the curved edge. Don’t sew the straight edge at the bottom because that’s where you’ll be sewing the base! Make sure your stitches are secure and try not to put them too close to the edges.
Step four – sew on the bottom
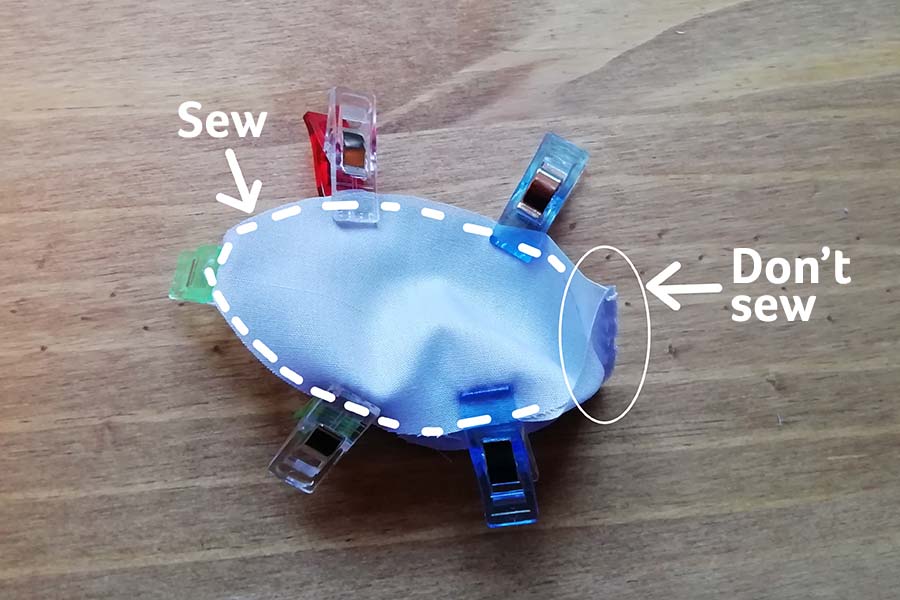
Next, pin the bottom in place remembering to put the side you want on show on the inside. Sew around the edge, leaving a gap by your mouse’s bum so you can turn it all the right way round and stuff it.
Step five – turn it the right way round
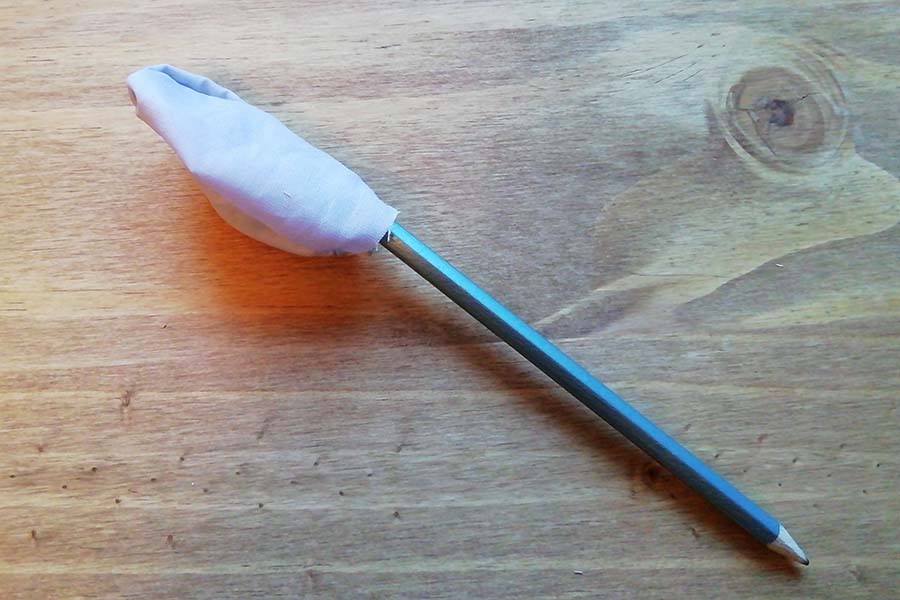
Now you’ll need to gently push all the material back through the gap you left. You might want to use a pencil to help push the nose out on this one. Remember to be quite gentle so you don’t poke holes in the stitching you just spent ages doing.
Step six – stuff your mouse
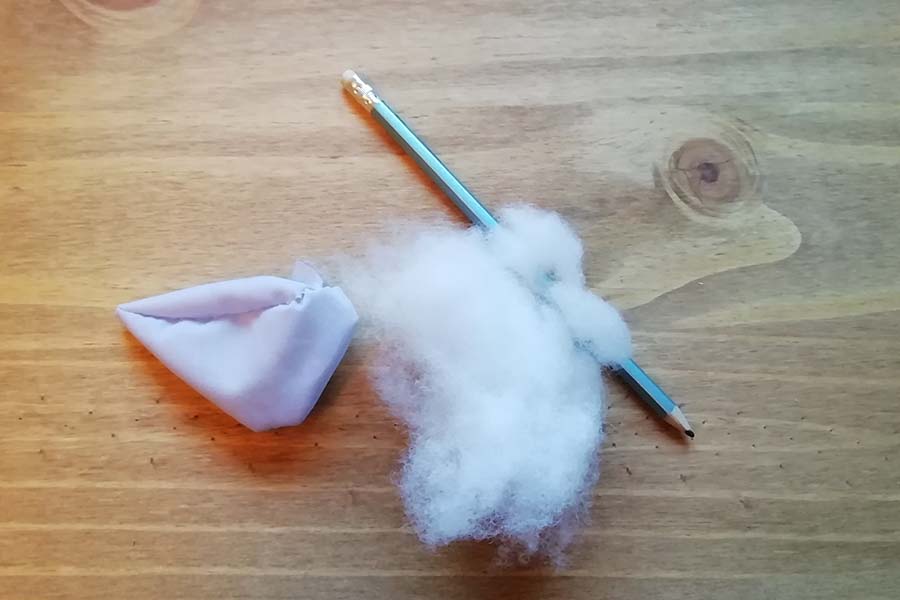
Now you’ll need to get your stuffing and fill your mouse until he’s nice and plump (but not too fat – we don’t want his seams breaking). Again, a pencil might come in handy to help fill the nose of your mouse. If you’re adding catnip, now is the time! You won’t need much – a teaspoon or dried catnip in with the stuffing will be plenty.
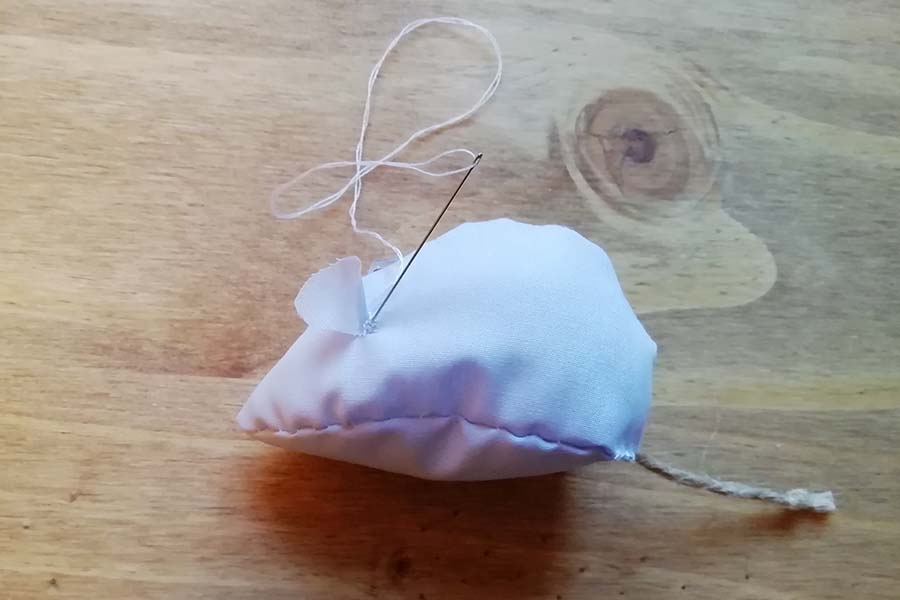
Step seven – sew up your mouse and add the tail
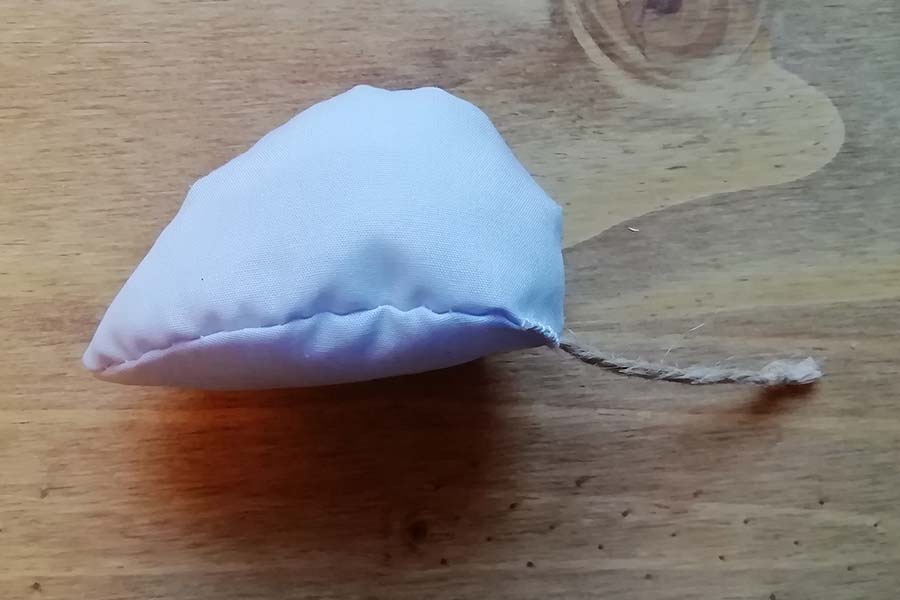
Now you’ll need to sew up your mouse. Pop the tail in so around half a centimetre is inside the mouse then sew the hole and tail securely. Make sure you pay close attention to the tail so it can’t be ripped out during playtime! We've tied a knot in the end of our tail to stop it fraying.
Step eight – sew the ears
Fold your ears in half and sew them securely to the side of your mouse’s head. Again, make sure they’re secure and can’t be easily pulled off.
Step nine – add eyes
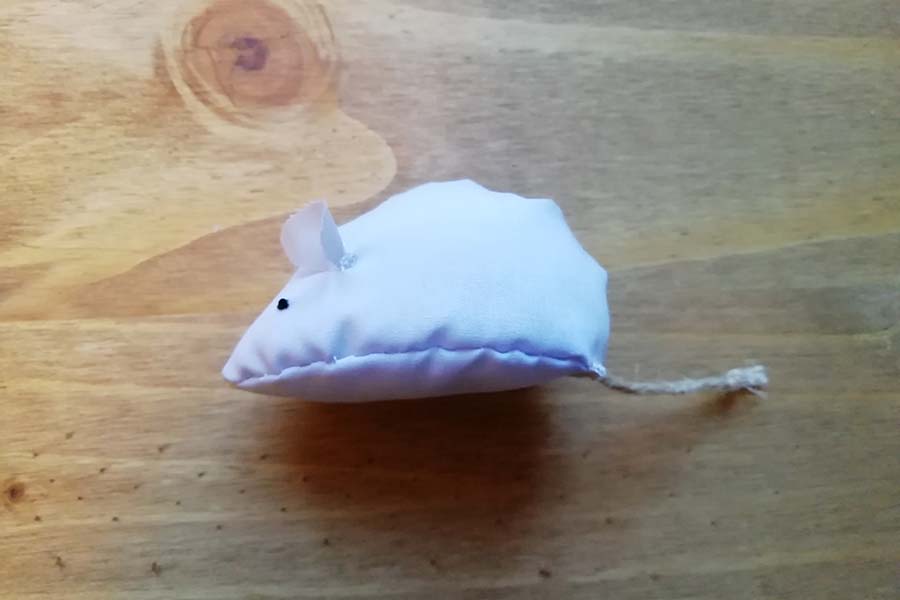
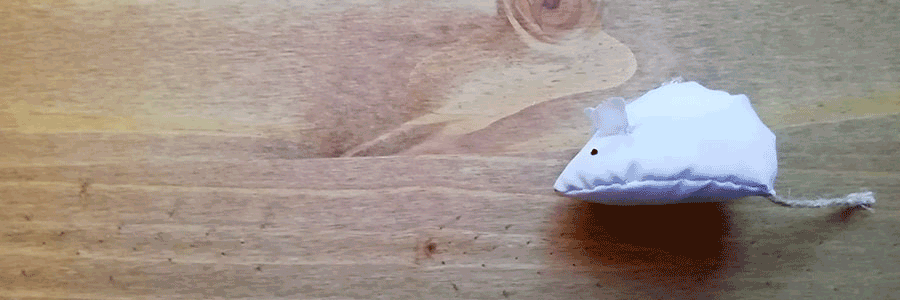
If you want to, you can add eyes to your mouse. We did this by stitching them using some black thread. Then, you’re all done! We hope your cat (or you mum’s cat) enjoys their new toy.
Remember you should always supervise your cat with a toy and make sure to repair or replace any toys that are getting worn or damaged.